DeathAdder V3 Pro Software, Features & Functionality
Razerthink – The Razer DeathAdder V3 Pro software offers a variety of features and functions that enhance your gaming experience. This software allows you to customize various DeathAdder V3 Pro mouse aspects to suit your preferences and playing style. One of its main features is the adjustable DPI settings. You can adjust the mouse sensitivity to your liking, enabling precise cursor control or fast movement depending on your needs. This ensures you have the perfect balance between speed and accuracy in your games.
The software also provides advanced Chroma RGB lighting options. However, DeathAdder V3 Pro has No RGB Lighting. Another essential function is the programmable buttons. With this feature, you can assign commands, macros or even launch specific applications with a button click. This allows quick access to essential functions, streamlining your gaming experience and increasing efficiency.
The onboard memory storage capability is another valuable aspect of the software. You can save your custom settings directly on the mouse, allowing you to use your preferred configuration on any computer without reconfiguring the mouse each time. In addition, the software offers advanced macro functionality. You can create complex macros using the macro editor, recording and assigning a series of actions or keystrokes to a single key. This is especially useful for executing complex commands or automating repetitive game tasks.
Other features include polling rate adjustments for smoother cursor movement, surface calibration for optimized tracking on different surfaces, battery optimization settings to manage power usage and monitor battery life, profile management for several game-specific configurations, and firmware updates to ensure Your DeathAdder V3 Pro is always up to date with the latest fixes.
Overall, the Razer DeathAdder V3 Pro software provides a comprehensive suite of features and functions that empower you to personalize and maximize the performance of your gaming mouse, enhance your gaming experience, and give you a competitive edge.
Here are some key features and functionalities of the DeathAdder V3 Pro software:
- Adjustable DPI Settings: Adjust the DPI (dots per inch) sensitivity to suit your preferences and playing style. Fine-tune cursor speed for precise control or increase it for fast movement.
- Programmable Buttons: Customize mouse buttons according to your needs. Assign commands and macros or even launch apps with just a click of a button, providing quick access to essential functions.
- Onboard Memory Storage: Store your settings directly in the mouse’s onboard memory. This allows you to take your custom configuration wherever you go, even when using the mouse on a different computer.
- Advanced Macro Functionality: Create complex macros with the software’s macro editor. Record and assign actions or keystrokes to a single button, simplifying repetitive tasks or executing complex in-game commands.
- 5. Polling Rate Adjustment: Fine-tune the mouse’s polling rate, which determines how often it reports its position to your computer. Higher polling rates can provide smoother, more responsive cursor movement.
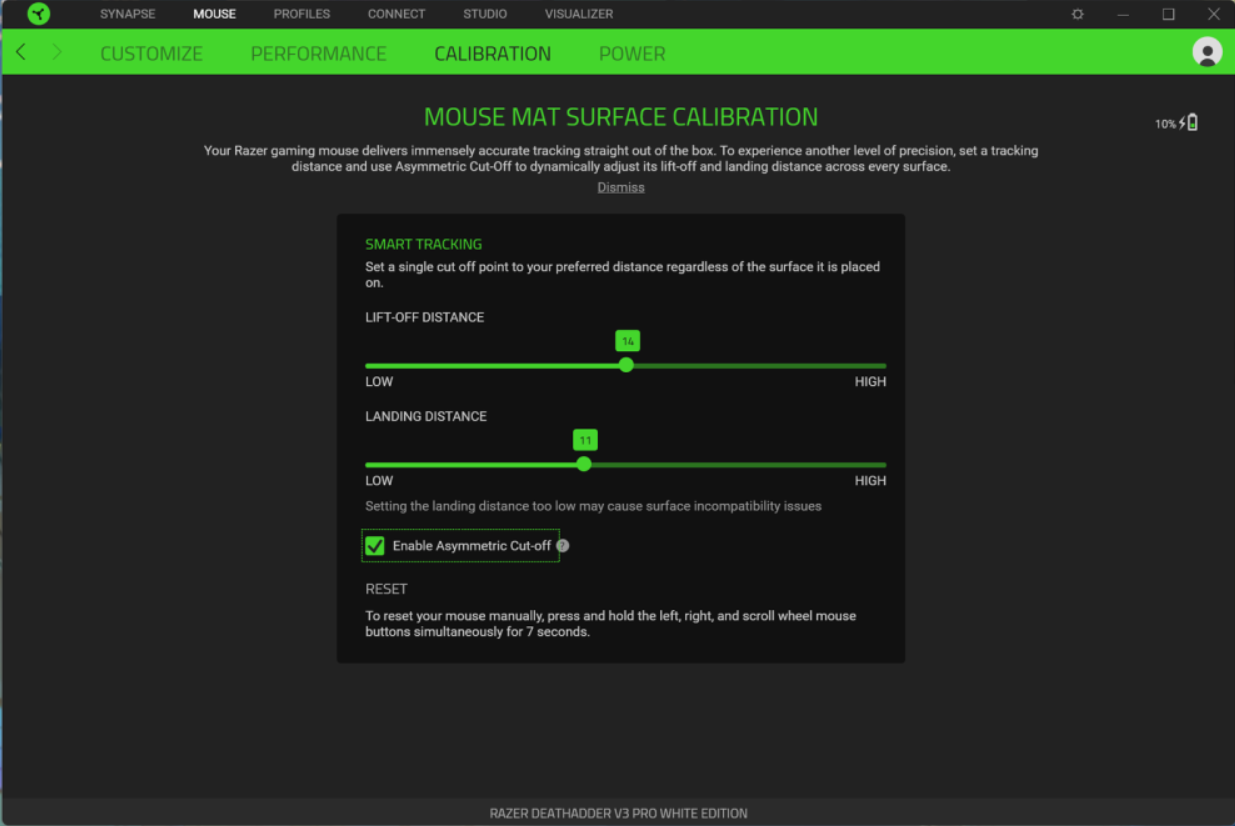
- Surface Calibration: Optimize mouse performance on different surfaces by calibrating it using the software. This ensures accurate tracking and response, regardless of your mousepad or gaming surface.
- 7. Battery Optimization: Monitor and manage the battery life of your DeathAdder V3 Pro. The software lets you customize power-saving settings and provides notifications to ensure you know the battery level.
- Profile Management: Create and manage multiple profiles for different games or applications. Easily switch between profiles, allowing you to have custom settings for each specific scenario.
- Firmware Updates: Stay up to date with the latest features and improvements by installing firmware updates through the software. This update ensures your DeathAdder V3 Pro runs at its optimal performance.
These features and functions empower you to personalize your Razer DeathAdder V3 Pro gaming mouse, providing greater control, convenience, and customization options for your gaming needs.
Software compatibility with (operating system)
The software is compatible with multiple operating systems. Here are some of the standard operating systems supported by the Razer DeathAdder V3 Pro software:
- Windows: This software is compatible with various versions of Windows
- Windows 10
- Windows 8
- And Windows 7.
- macOS: Razer also offers software support for macOS users. You can download the Razer DeathAdder V3 Pro software designed for macOS, ensuring compatibility and access to all features and functions. It is important to note that the availability and range of software features may vary across operating systems. Razer’s official software usually offers the most comprehensive feature set and seamless integration with their gaming peripherals.
Synapse 2.0 system requirements
File Size:
- 21.6 MB (PC)
- 25.4 MB (MAC)
Date added:
- August 13, 2015
Operating System:
- Windows 7 32-bit / 64-bit
- Windows 8 32-bit / 64-bit
- Windows 10 32-bit / 64-bit
- Mac OS X 10.10 – 10.14
- 100 Mbyte of free hard disc space
- Valid email, software download, license acceptance, and internet connection are needed to activate full features and update software. After activation, full features are available in optional offline mode.
Go to Razer Synapse 2.0 download page and click “Download Now.”
Synapse 3.0 system requirements
- Windows 10 64-bit or Windows 11
- Currently unavailable for MacOS
- 500 MB of free hard disk space
- Valid email, software download, license acceptance, and internet connection are needed to activate full features and update software. After activation, full features will still be available even if you are not internet-connected.
Go to Razer Synapse 3.0 download page and click “Download Now.”
“Note: Mac OS is not supported in Synapse 3.”
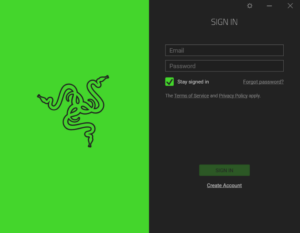
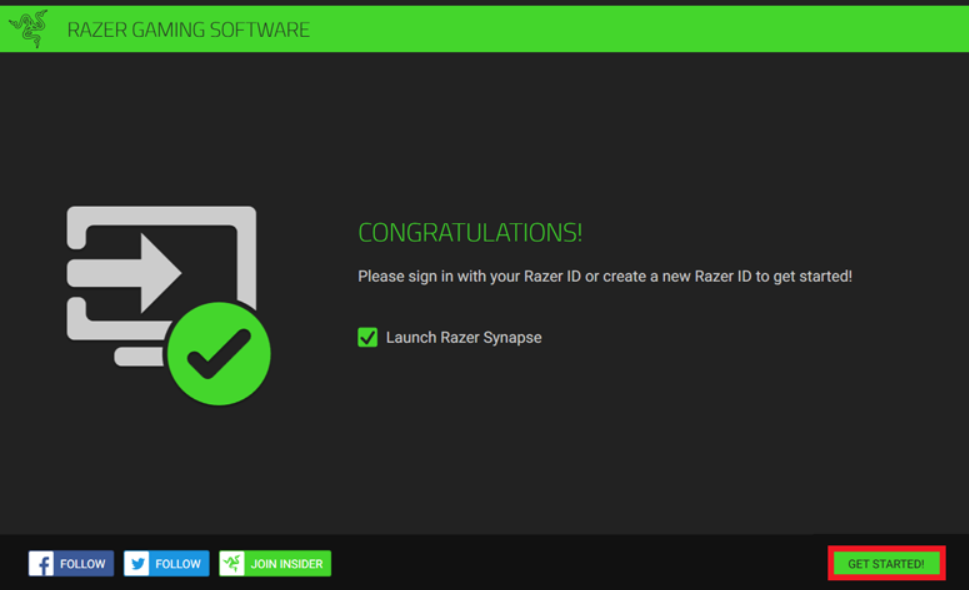
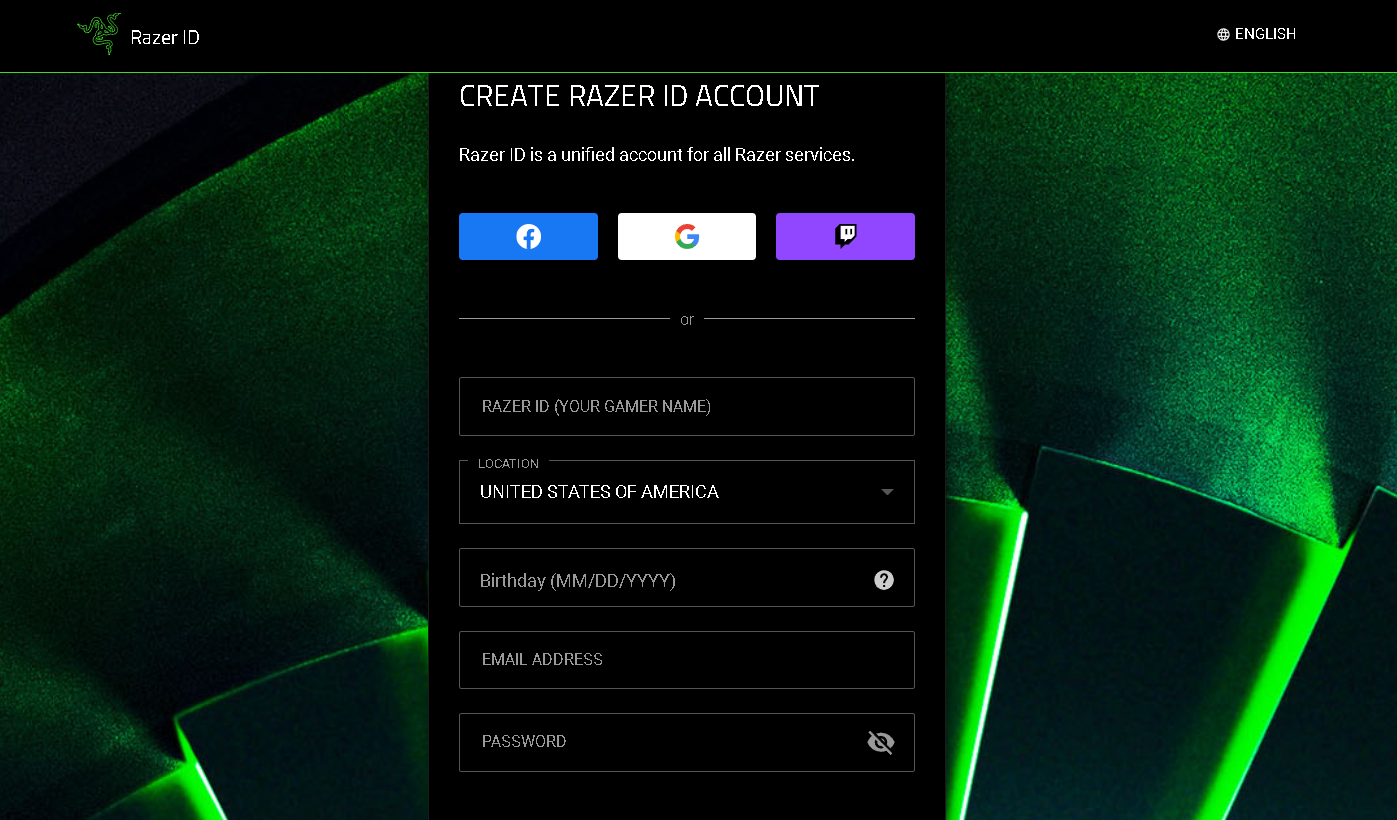
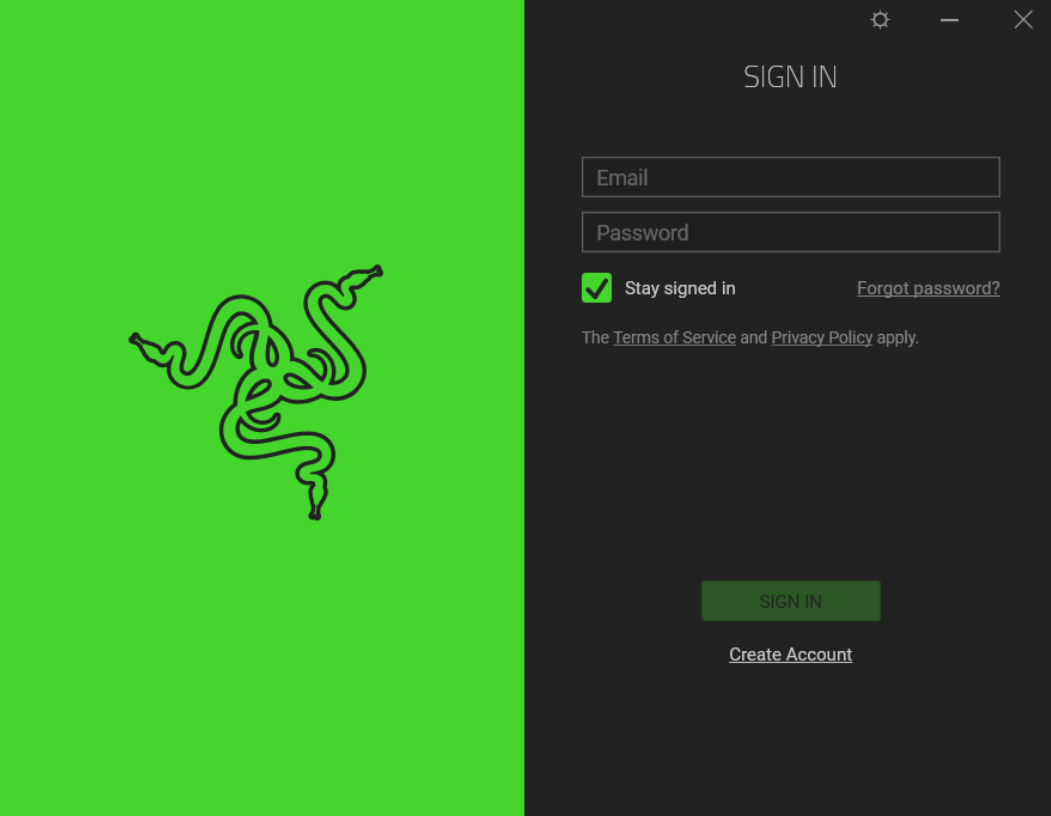
Before installing, Create a new Razer ID account or log in via Facebook, Google or Twitch on the same page. You can also press the button and click “HERE” To be directed to the page “CREATE RAZER ID ACCOUNT.”
“Note: Apple ID sign-in is only available on select Razer mobile apps.”
How to login to Razer ID account with Apple ID
You need the following to sign in with your Apple ID:
- iOS 13 or later
- Apple ID with two-factor authentication enabled
- Access to iCloud using your Apple ID
How to register Razer ID via Apple ID?
Apple ID users who wish to create an account with us can register with their Apple ID instead of filling out a form. Just follow these steps:
- Click the “Sign in with Apple” button and sign in with your Apple ID. You may have to accept additional terms from Apple.
- “Sign in with Apple” automatically fills in your name and email address from your Apple ID. You can edit your name and choose “Share my email” or “Hide my email “.
- Prepare your Razer ID password when prompted. It will not replace your Apple ID password.
- Read Razer’s Terms of Service and Privacy Policy, then click or tap “Accept” if you agree to the Terms and Conditions.
- There is an option to opt-in to receive information and to keep abreast of our latest products and services; You can accept, decline, or skip this step. Finished.
Software installation guide
To install the software, follow these step-by-step instructions:
- Start by ensuring your Razer DeathAdder V3 Pro mouse is connected to your computer using a USB cable or wireless.
- Download the unique software for this operating system.
- Navigate to the “Support” or “Downloads” section of the website. You can usually find it in the top or bottom menu.
- Search for Razer DeathAdder V3 Pro in the product search bar or find it in the mouse category.
- On the product page, look for the “Software & Drivers” section or a similar section to download the software for DeathAdder V3 Pro.
- Select the appropriate operating system you use with your computer, such as Windows or macOS.
- Click the “Download” button to start the Razer DeathAdder V3 Pro software installer download.
- After the download is complete, locate the downloaded file. It’s usually found in your computer’s default download location, such as the “Downloads” folder.
- Double-click on the downloaded file to launch the installation process.
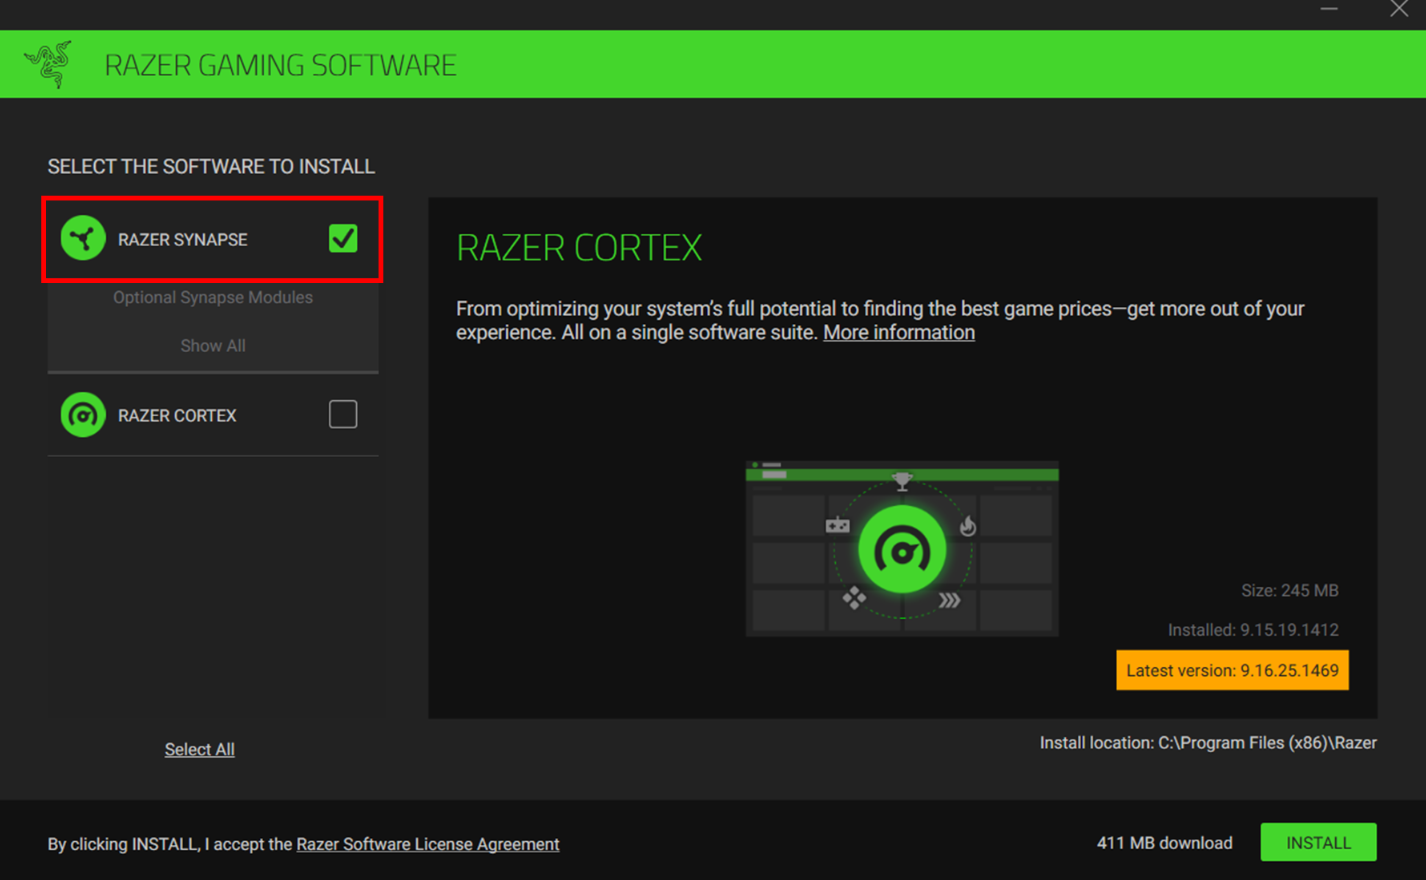
- Follow the on-screen instructions provided by the installer. This usually involves accepting the software license agreement, choosing an installation location, and selecting additional options.
- If prompted, connect to the internet during installation, as the software may require downloading additional components or updates.
- Once the installation is complete, you will see a confirmation message indicating that the Razer DeathAdder V3 Pro software has been successfully installed on your computer.
- Locate the Razer DeathAdder V3 Pro software on your desktop or your computer’s program or application menu.
- Launch the software by double-clicking on its shortcut.
- Connect your Razer DeathAdder V3 Pro mouse to your computer if you haven’t already.
- The software will automatically detect your mouse. Follow the prompts or instructions on the screen to configure and adjust your mouse settings according to your preferences.
- Once you have completed the customization, you can close the software and use the Razer DeathAdder V3 Pro with your configured personalization settings.
By following these steps, you will successfully install the Razer DeathAdder V3 Pro software and start customizing your mouse settings for an optimal gaming experience.
How to customize settings software
To customize settings using the Razer DeathAdder V3 Pro software, follow these steps:
- Launch the Razer DeathAdder V3 Pro software on your computer. You can find the software on your desktop or your computer’s program or application menu.
- Ensure your Razer DeathAdder V3 Pro mouse is connected to your computer and recognized by the software.
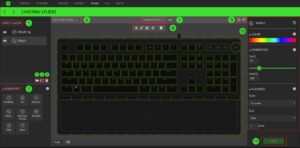
- Once the software opens, you will see a user-friendly interface with various customization options.
- Explore the tabs or sections available within the software to access various settings and features. The specific layout and organization may vary depending on the software version, but you should find options related to customization.
- Look for options such as “Performance”, “Sensitivity”, or “DPI” to adjust the mouse sensitivity settings. You can drag a slider or enter a numeric value to set the desired DPI (dots per inch) for precise cursor control.
- Find the option to configure mouse buttons. This can include assigning custom commands and macros or launching applications to each button. Click the desired button and select the action from the available options.
- Look for advanced features such as surface calibration or take-off distance adjustment. This option lets you optimize your mouse’s performance based on the surface you’re using and fine-tune its tracking behaviour.
- Take advantage of additional features such as profile management. Create multiple profiles adapted to different games or apps and switch between them as needed. Customize specific settings for each profile, such as button assignments and DPI preferences.
- Save your custom settings to the mouse’s onboard memory if supported. This allows you to maintain your configuration even when using the mouse on a different computer or without running software.
- Once you have customized and adjusted the settings to your liking, close the software. Your custom settings will be applied to your Razer DeathAdder V3 Pro mouse.
-
Software DPI customization
- Launch the Razer DeathAdder V3 Pro software on your computer. Make sure your mouse is connected and recognized by the software.
- Look for the “Performance” or “Sensitivity” tab in the software interface. This is where you can access the DPI adjustment options.
- You will usually find a slider or numeric input field in the DPI section that allows you to adjust the DPI level. DPI refers to the sensitivity of the mouse cursor. Higher DPI values result in faster cursor movement, while lower DPI values offer more precise control.
- Drag the slider or enter a numeric value to set the desired DPI level. Some software versions allow you to set different DPI values for the X and Y axes separately.
- You can also set multiple DPI levels to switch between them during gameplay. This can be useful for different scenarios or games requiring different sensitivity levels. Click the “Add” or “+” button to create additional DPI profiles.
- If applicable, adjust the DPI indicator LED’s colour to identify the active DPI level quickly. Click on the available colour options and select the colour of your choice.
- Test the DPI setting by moving your mouse and observing the cursor’s movement. Make adjustments as necessary until you find a sensitivity that matches your preference.
- Save your DPI settings and any other customized changes you make in the software. This will ensure that your preferred settings are applied every time you use the mouse.
- Close the software, and your custom DPI settings will be saved and active on your Razer DeathAdder V3 Pro mouse.
-
Software polling rate adjustment
Adjusting the polling rate using the Razer DeathAdder V3 Pro software lets you fine-tune how often the mouse reports its position to the computer, resulting in different responsiveness and cursor movement levels. By following these steps, you can adjust the polling rate to your liking:
- Launch the Razer DeathAdder V3 Pro software on your computer, and make sure the mouse is connected and recognized.
- Find the “Performance” or “Polling Rate” tab in the software interface. This tab provides access to poll rate adjustment options.
- In the polling rates section, you will usually find a drop-down menu or radio buttons displaying the available polling rate options.
- Select the desired polling rate from the options provided. Common choices include 125Hz, 500Hz, and 1000Hz. A higher polling rate results in more frequent updates, leading to smoother cursor movement and increased responsiveness.
- Some software versions may offer additional voting-level options beyond those listed above. Where available, you can choose a specific voting level that aligns with your preferences or the requirements of your game or work environment.
- Test the adjusted polling rate by moving the mouse and observing the cursor’s movement. Evaluate whether the cursor feels more responsive and smoother at the newly set polling rate.
- Save your polling rate adjustments and any other changes you make in the software. This ensures that your preferred settings remain active whenever you use the mouse.
- Close the software, and the adjusted polling rate will be saved and applied to your Razer DeathAdder V3 Pro mouse.
-
Software button mapping
- Launch the Razer DeathAdder V3 Pro software on your computer. Make sure your mouse is connected and recognized by the software.
- Find the “KeyMapping” or “Customize Button” section in the software interface. This is where you can access the button mapping options.
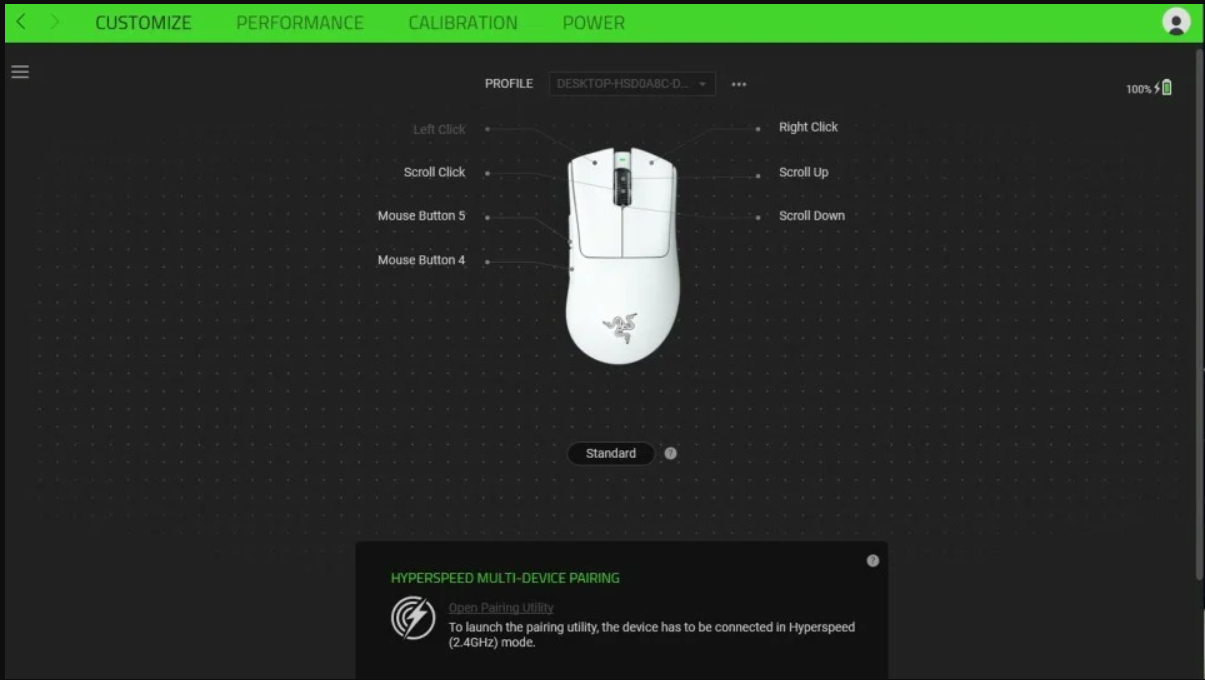
- In the button mapping section, you will usually see a graphical representation of your mouse, showing the different buttons available for customization.
- Click the specific button you want to map or assign a new function. The software should highlight the selected button.
- Select the desired action or function to be assigned to the selected button. This can include standard commands, keyboard shortcuts, macros, application launches, multimedia controls, or other options.
- Software versions may offer advanced customization options if the desired action is unavailable in the predefined options, such as recording a macro or script command. Explore these options to create more complex button mappings.
- Repeat the process for each button you want to customize. You can assign different functions to different buttons based on your preferences and usage patterns.
- Test the button mapping by pressing the appropriate button on your mouse and observing the action or function it performs. Make adjustments as necessary until you are happy with the button mapping.
- Save your button mapping configuration and any other customization changes you make in the software. This ensures that your preferred settings remain active whenever you use the mouse.
- Close the software, and the customized button mapping will be saved and applied to your Razer DeathAdder V3 Pro mouse.
-
Software advanced macros.
The Razer DeathAdder V3 Pro software provides advanced macro functionality, allowing you to create and customize complex sequences of actions and commands that can be assigned to a single button on your mouse. By following these steps, you can take advantage of advanced macro features using the software:
- Launch the Razer DeathAdder V3 Pro software on your computer. Make sure your mouse is connected and recognized by the software.
- Find the “Macro” or “Advanced Macro” section in the software interface. This is where you can access advanced macro creation and customization options.
- You’ll usually find options for creating or managing new macros in the macros section.
- Click the “New Macro” or similar button to create a new macro.
- Give your macro a descriptive name to help you identify it later.
- Begin recording your macro by clicking the “Record” or “Start Recording” button. The software will start capturing your actions.
- Perform the sequence of actions or commands that you want to include in your macro. This can involve keyboard input, mouse movements, mouse clicks, delays, and other supported actions.
- Once you have completed the sequence you want, click the “Stop Recording” button or a similar button to stop recording the macro.
- Review and refine your macro if necessary. Some software versions may offer options to edit, delete, or rearrange the actions recorded in the macro.
- Assign macros to specific buttons on your mouse. Select the button from the software interface and select the newly created macro from the available options.
- Test the macro by pressing the assigned button on your mouse. The macro will execute the recorded action sequence or command.
- Save your macro configuration and any other customized changes you make in the software. This ensures that your preferred settings remain active whenever you use the mouse.
- Close the software, and the advanced macro configuration will be saved and applied to your Razer DeathAdder V3 Pro mouse.
-
Battery optimization settings
The Razer DeathAdder V3 Pro software provides battery optimization settings to help you maximize the battery life of your wireless mouse. By adjusting this setting, you can extend the usage time between charges. The following describes the battery optimization settings available in the software:
- Launch the Razer DeathAdder V3 Pro software on your computer. Make sure your mouse is connected and recognized by the software.
- Look for the “Battery Optimization” or “Power Management” tab in the software interface. This is where you can access battery optimization settings.
- In the battery optimization section, you usually find options to adjust power-saving settings and manage battery usage.
- Adjust the “Sleep Mode” setting. Sleep mode determines how quickly the mouse switches to a low-power state when unused. You can choose a shorter duration to save battery or a longer duration if you prefer an instant response.
- Enable “Battery Saver” mode, if available. This mode reduces mouse power consumption by minimizing unnecessary background processes or lighting effects.
- Adjust the LED lighting settings. Some software versions allow you to adjust the mouse’s LEDs’ brightness, colour, or lighting effect. Lowering the brightness or turning off lighting effects can save battery power.
- Set the “Auto Power Off” or “Shut Down” time. This feature automatically turns off the mouse after a certain period of inactivity. You can choose a shorter time to save battery or longer if you prefer to keep the mouse active.
- Save your battery optimization settings and any other customization changes you make in the software. This ensures that your preferred settings remain active whenever you use the mouse.
- Close the software, and battery optimization settings will be saved and applied to your Razer DeathAdder V3 Pro mouse.
-
Software onboard memory usage
The Razer DeathAdder V3 Pro software offers onboard memory functionality, allowing you to store and take advantage of custom settings and configurations right on the mouse’s a description of the onboard memory usage in the software:
- Launch the Razer DeathAdder V3 Pro software on your computer. Make sure your mouse is connected and recognized by the software.
- Look for the “Onboard Memory” or “Profile” tab in the software interface. This is where you can access the onboard memory usage settings.
- In the onboard memory section, you will usually find options to create, edit, and manage profiles which can be saved directly on the mouse.
- Create a new profile by clicking the “New Profile” or similar button. Give your profile a descriptive name to help you identify it later.
- Customize settings and configurations for the profile. This includes DPI settings, button mappings, lighting effects, macros, and other options.
- Save the profile to the mouse’s onboard memory. Look for a “Save to Device” button to transfer the profile from the software to the mouse memory.
- Manage multiple profiles if desired. Some software versions allow you to create and save multiple profiles on the mouse, which can be helpful in different gaming setups or usage scenarios.
- Test the onboard memory usage by removing the mouse from your computer. The mouse should retain saved profiles and settings without requiring software to run in the background.
- Reconnect the mouse to your computer to reaccess the software if you need to make changes or update profiles stored in the onboard memory.
- Save any changes you make to your profile, or create a new profile as needed. These updates will be saved to the mouse’s onboard memory for future use.
Software is not working/recognizing the mouse.
If you are having trouble with the Razer DeathAdder V3 Pro software not recognizing or working with your mouse, you can try the following troubleshooting steps:
- Ensure Proper Connection: Check that the mouse is securely connected to your computer via USB cable or wireless. Try reconnecting the mouse to another USB port or establishing a wireless connection.
- Restart Software and Computer: Close the Razer DeathAdder V3 Pro software and restart your software and computer. This can help resolve temporary software or system glitches.
- Update Software: Check for available software updates for Razer DeathAdder V3 Pro. Visit Razer’s official website and download the latest version of the software compatible with your operating system.
- Reinstall Software: Uninstall existing Razer DeathAdder V3 Pro software from your computer and reinstall it. Be sure to follow the installation instructions carefully.
- Disable Antivirus/Firewall: Temporarily disable any antivirus or firewall software that might be blocking the Razer DeathAdder V3 Pro software from recognizing the mouse. If the software works after disabling this program, you can add an exception or configure settings to allow Razer software.
- Try a Different USB Port: Connect the mouse to your computer’s USB port if you use a wired connection. Sometimes, specific USB ports may need to provide more power or have compatibility issues.
- Update Mouse Firmware: Check if a firmware update is available for your Razer DeathAdder V3 Pro mouse. These updates can sometimes resolve compatibility issues and improve performance. Follow the instructions provided by Razer to update the mouse firmware.
Frequently Asked Questions
Do I need Razer Synapse for DeathAdder V3?
You must install Razer Synapse 3 to enable advanced features like macro recording, profile settings and more.
How do I change the DPI on my DeathAdder V3 Pro?
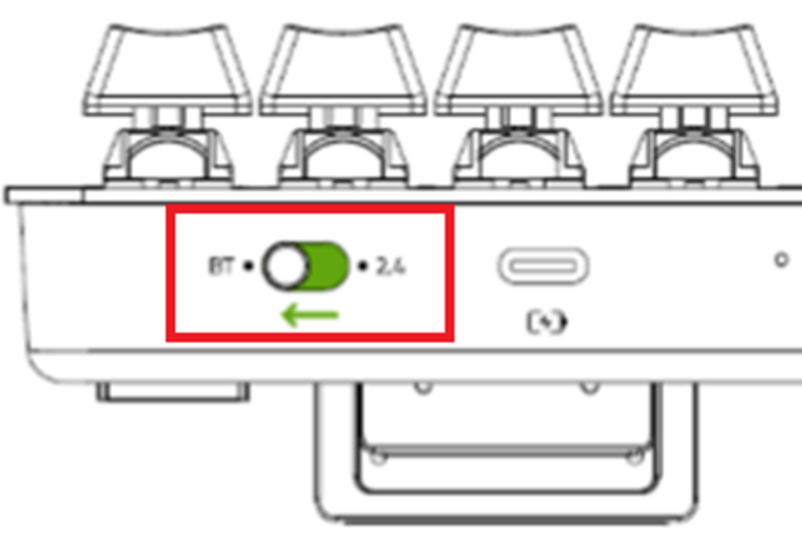
The function buttons on the Razer DeathAdder V3 Pro switches power (press and hold for 3 seconds for ON/OFF) and DPI (press and release).
Do I need Razer Synapse for DeathAdder?
Razer Synapse is a software released by Razer designed to configure and customize Razer’s hardware suite if you want to customize your Razer DeathAdder V3 pro profile.
How do I connect my Razer DeathAdder V3 to Synapse?
Free online technical support at www.razersupport.com.
- Step 1: Connect your Razer device to your computer’s USB port.
- Step 2: Install Razer Synapse when prompted* or download the installer from www.razerzone.com/synapse.
- Step 3: Register a Razer ID or log in to Synapse with an existing account